So I decided it would be good to start a thread about updates on Sketchup.
Here we can discuss upgrades, issues, etc... about Sketchup without interrupting city threads.
Feel free to talk about anything regarding S.U.
Video Tutorials:
Google Sketchup Tutorials
Building a quick Box Tower:
Part 1
Part 2
Austin55's Guide to Sketchup:
Chapter I
Getting Started
1. Camera/views
First things first, know how to use the camera. every time you open Sketch Up, a 2d figure appears. Use him to practice with. Try using,
Rotate (Globe) tool, Press the scroll wheel. For those with no scroll wheel, click on the Rotate Tool and left click to rotate.
The Pan tool: like moving on a 2d surface
The Zoom tool: zooms in and out
Eye Tool: look around without otherwise moving

The Camera is sometimes one of the most difficult things to use. you will need lots of practice to do this.
2. Drawing in 2D
now you can start drawing. Everything you make in Sketch Up stars out in a 2D shape. I wouldn't focus on making one particular thing yet, just practice drawing boxes, connecting edges,etc. Try fuddling with these,
Line (the most basic tool): Draws straight edges/lines
Box: Draws a 4 sided box of any dimension
Circle: Draws a circle expanding out from where you first clicked
Arc: Draw anything from a gentle curve,to an exploding circle.
theres also the free hand tool and hexagon tool to try out to,but these are a tad more advanced. now,lets go 3D!
3. Making a 3D Shape
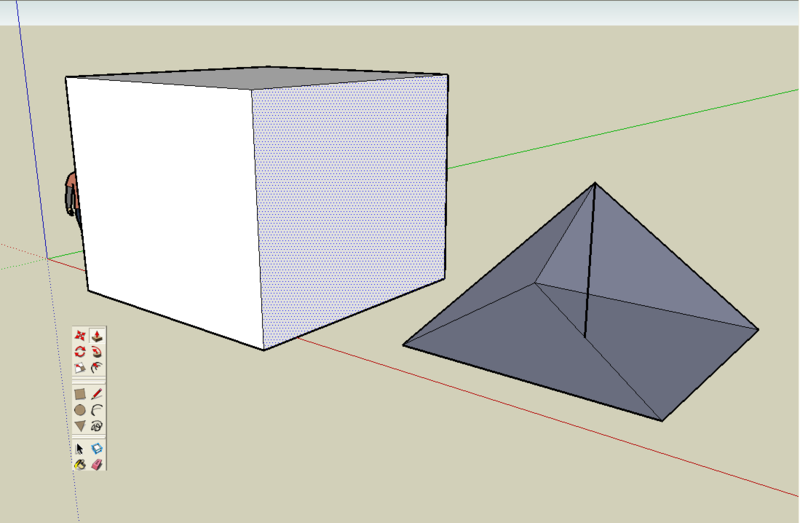
Well, draw a simple box. Boxes will be easy to make 3rd Dimensional. There are two ways to draw a 3d box: The Push/Pull tool or a freehand. To making something with even sides (IE,a box) use the Push-Pull tool. Hover over the face, click and drag. The shape will come out to any hight you requested. It's a little hard to explain, but is extremely easy.
Free-handing is best used for a shape that shrinks as it grows, like a pyramid. Draw another box and draw a diagonal line from one corner to another. On the line you just drew, hover the mouse over about the middle. The word "Center" will pop up. this is the exact center of the line. Using the Line Tool, click and drag the line upwards along the blue axis. The line will turn blue and the word "Blue Axis" will pop up. Click again still on the Blue axis to draw a vertical line. Use your camera skills to make sure the line is vertical. Then, from the top of the vertical line, use the Line tool to draw lines that connect to each corner of the 2D box. Do this for every corner of the box and, walla! you have a costume made pyramid!
 4. The Principal tools
The Principal Tools are very basic tools. youll find yourself using them alot. here is an overview of these tools
Select,allows you to select multiple faces or edges with a quick drag,or single peices with a single click. this wil be a use ful tool as you learn more advanced techniques.
Eraser,works like the select tool,sweep to erase all it touches or a quick click toerase single objects.
Theres also an Undo button! hit Ctrl-Z to use. best tool in SU.
Theres two more tools,one which yo will probably use and another which you will need on just about everthing,that is the
5. Painting
Paint bucket! now your models can come alive with colors and textures. there are many options inside of the paint window that im not ready topost yet,so Part 5 isnt done yet.
6. Making Stuff
so,ive now taght you the basics. Now,start a new model,and think of something you want to make. How about a simple little car? itll be great to practice on,and thats the best way to learn SU.
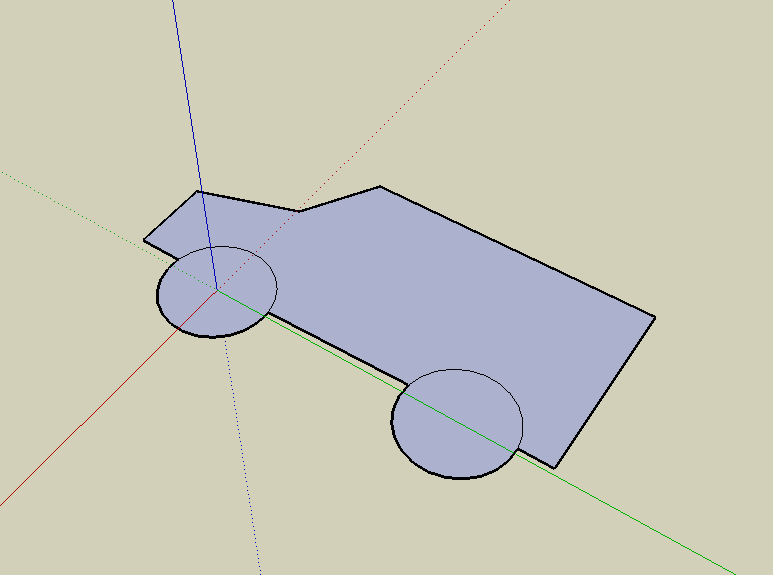
Soo first,use the circle tool to draw a circle,then,use the select tool to highlight it. now,can you find the move tool? use this and hold ctrl and click,you shouldve copyied thw wheel. move it along the axis and click again to release it there.
Now,finish outlinging the car.
Push pull it untill its 3d

Draw any details you want,like windows

but wait! dont draw on bothe sides yet. remember the copy tool? use it here again,copy your model,and then right click. one of the options in the pop up tab is 'Flip along". flip along the axis you think you need,you can always hit
Ctrl-Z to undo!

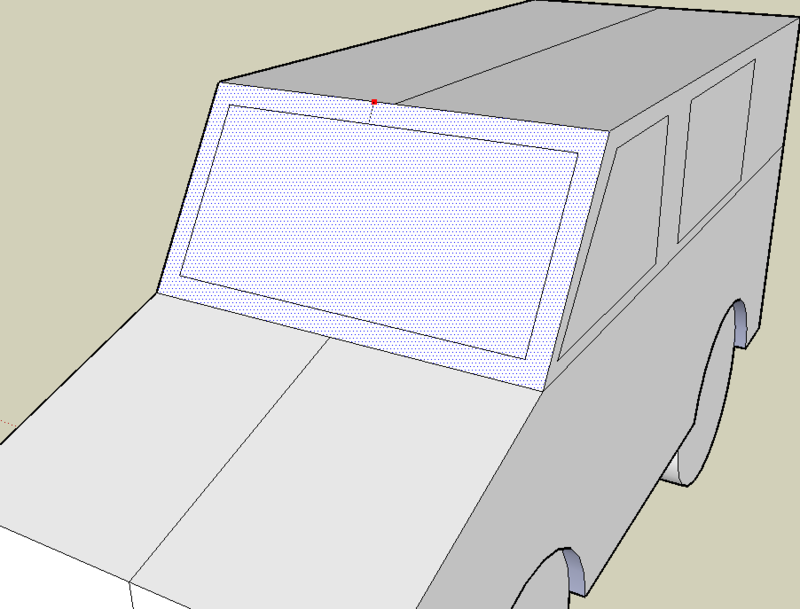
connect the car back together,and erase that line were th winshielpd should be. you should now have one big face. find th offset tool to redilate the faces your hovering over. resize that face till it looks like a winshield. pretty cool huh?
Now,one of the best parts,use the paint bucket tool to color your car!
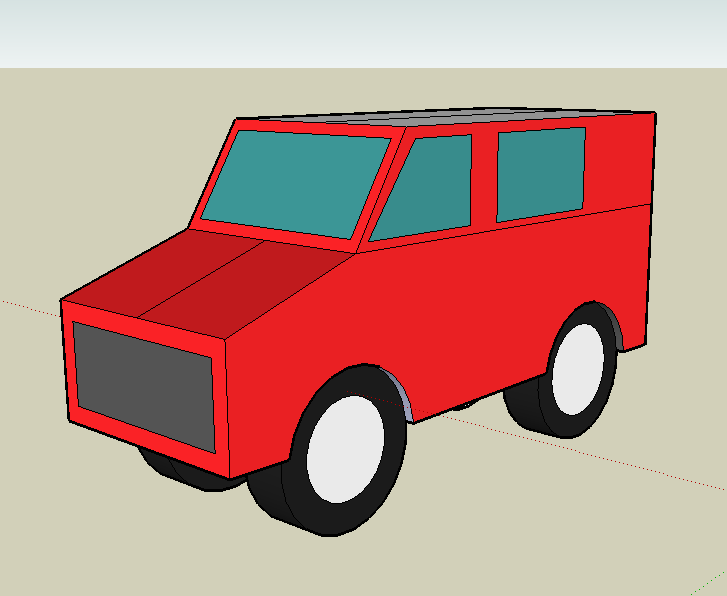
Under the view toolbar at the top are several things which you can use for presenting your model. play around with the,especialy the 'Edges' one. now,log in and show us waht you made in this thread!

Some Tips & Tricks about Sketch Up:
Getting Snapshots from Google Earth:
1. Open Google Earth and zoom in to the desired location.
2. Open SketchUp and click
Get Current View.
3. A black & white picture of the terrain previously view on Earth will appear in SketchUp.
4. The picture will appear flat, to make it 3D move mouse over
Toggle Terrain and click on it.
5. The picture will looks 3D and Walla! You have a real-live terrain from Google Earth.
Exporting Models into Google Earth:
1. Open the model you wish to view in Earth.
2. Click on
File at the top-left corner of the SketchUp window.
3. Move mouse over
Export.
5. A small window will appear and click on
3D Model.
6. Another window will pop up and just click save.
Malec's Component models:
First of all it's probably good to read some of these tutorials before starting, especially the Inferencing tutorial.
http://sketchup.google.com/training/..._with_gsu.html
1: Regular Residential Tower
Make a basic shape (such as a square but can be anything you want). This will be your basic floorplate

This example is a residential tower which will need balconies. Create them wherever you want.

Some internal structure is nice if you want to make the building look good. Here I’ve added a core and some columns. You could go further and add rooms and everything later if you want. This can be easily changed though as will be shown later

Raise the internal features, the amount you raise is the floor to ceiling height. Should be around 3m probably.

Now select the bottom floor. Click the move tool, press Ctrl+C and drag the copied floorplate up to create the ceiling. Then, use the push and pull tool to make the floorplate solid (I normally raise it by about 0.3m here but you can do what you like).

Next select the floorplate and internal structure (basically everything about the ground) and make it into a component (make sure you replace the existing stuff with the comoponent).

Next, move the balconies up to meet the ceiling and use the push and pull tool the same way as for the floorplate. NB, if you have a balcony somewhere else on the tower that looks the exact same then don’t raise the copy up. Example, in my tower each of the 4 sides are the same and there are 2 distinctly different balconies, one at the corner and one in the middle. Therefore only work with two balconies. Also make them into components.


Edit each balcony and add some railing or something.


Now make a new component and create some façade. Again, if the shape is the same on all sides only make one side.

Copy the façade and balconies

Rotate them around to fit all sides of the tower

Now select all the components and using the move tool and Ctrl+C create the next floor. What you can also do is before doing this nest all the components into one big one in order to make it easier to copy and paste and maybe make the lag a little less.

Now straight away type “*70” or any number you wish. And Voila! Look what you have!

Delete any unnecessary bits hanging off such as these balconies at the top of the building.

Now here’s the beauty of using components.
Edit the façade and colour it in the way you want it. You’ll find that the whole building has been edited. Another good thing about this method is that if you made a mistake and copied it all over the tower you can easily fix it just by editing one component.

Now also edit and colour in the balconies and the floorplates.

If you have kerkythea first go to “view->animation->add scene”. Then in the materials editor edit the names of all your glass by putting “TG_” at the start of each name. Also go to “window->shadow” and turn on “use sun for shading”

Final render using metropolis light transport as the rendering method.
 2: Twisting Residential Tower
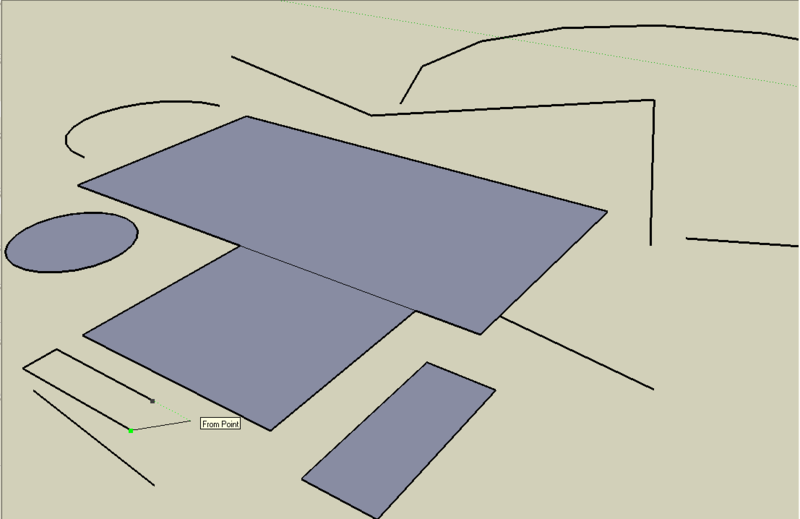
Go back to where you had one floor completely done. Make a vertical line somewhere, this is normally in the dead centre but it can be elsewhere too. This will be your axis of rotation. If you want it in the centre just make a diagonal line joining 2 corners and the midpoint is your point from where you will start to draw the vertical line.

Open the floorplate component and just select the floorplate (not the columns).

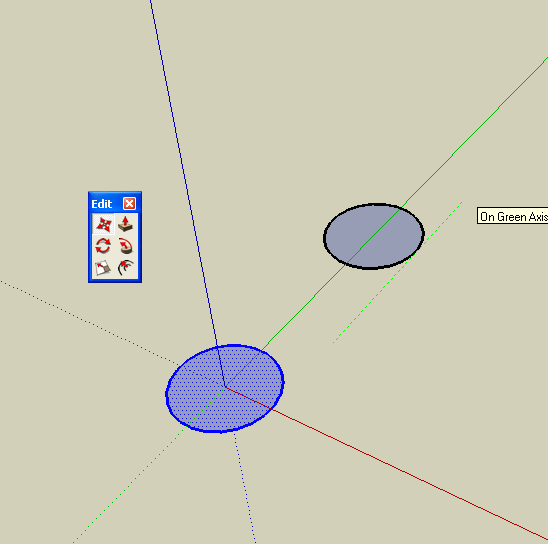
With that selected, click the rotate tool. Now place it on the centre axis and click once, then move the mouse out and click once more. Then move the mouse to the right or the left, the selected section will start to rotate. You will have to figure out how much rotation you need per floor, this is easy to work out. If you want say, 90 degrees rotation for the whole tower and you have 45 floors then you will have 2 degrees of rotation per floor. What you do is type in the number (such as 2) at this stage. Your rotation is done.

Now click on the balconies and rotate them the same amount. No need to open the components since you don’t need to distort them.

Now open the façade component and select only the very top of it.

Rotate it the same way as done for the floor plates.

Soften the extra edges that appear from the rotation.

Now you’ve done one complete floor. Make that floor a component if you wish and copy it above the 1st one. Then rotate it as usual.

Repeat this for a while until you have say, 10 floors ready.

Now to speed things up copy the whole lot and instead of rotating by 2 degrees rotate by 20! Within a few seconds you have the entire tower:

Render it in Kerkythea as before if you want.
Render coming in about an hour.


 Threaded Mode